Wingback makes it easy to collect payment and address data from your customers during the signup process and signing them up to a plan in a simple and secure manner.

  • Easier and faster to integrate: Wingback and Wingback.js provide a simple and easy-to-use API that abstracts away the complexity of integrating with Stripe and building your own plan management system. This means that you can get up and running much faster than if you were to build your own solution on top of Stripe.
  • Handling payment and plan management: With Wingback and Wingback.js, you don’t have to worry about the low-level details of interacting with Stripe’s API and keeping track of all your plans. We take care of all the complex logic for handling payments and managing plans for you, so you don’t have to spend time building and maintaining your own solution.
  • Take care of Billing: Wingback handles all billing processes for you, which means you don’t have to worry about implementing and maintaining your own billing system.

Integrating Wingback into Your Signup Flow

In order to integrate Wingback into your signup flow, you’ll need to follow these steps:

1. Create a new Customer in Wingback (Backend)

Before collecting payment and address data from your customer, you’ll need to first create a customer in Wingback. You can do this using the Create Customer endpoint. We recommend you to do this in your signup flow as soon as a customer creates a new account and as early as possible in the account creation process. You will need to store the wingback identifier in your database along your customers account data. Once the customer has validated their account (for example, by confirming their email address), mark them as active using the Activate endpoint to enable charges on this account.

server.js
// Create a New Wingback Customer Profile 

fetch('https://api.app.wingback.com/v1/c/customer', {
  method: 'POST',
  headers: {
    'Content-Type': 'application/json',
    'wb-key': 'YOUR_SECRET_API_KEY'
  },
  body: JSON.stringify({
    // all optional
    emails: {'main': 'customer@example.com'},
    name: 'John Doe',
    customer_reference: 'your-internal-customer-reference-or-id' 
  })
})
  .then(response => response.json())
  .then(data => {
    // TODO: store wingbacks customer id in your database!
    console.log(data);
    customerId = data.id;
  })
  .catch(error => {
    console.error('Error creating customer:', error);
  });

// Activate a Wingback Customer 
fetch('https://api.app.wingback.com/v1/c/customer/'+customerId+'/activate', {
  method: 'POST',
  headers: {
    'Content-Type': 'application/json',
    'wb-key': 'YOUR_SECRET_API_KEY'
  }
})
  .then(response => response.json())
  .then(data => {
    // TODO: proceed to next step
    console.log(data);
  })
  .catch(error => {
    console.error('Error activating customer:', error);
  });

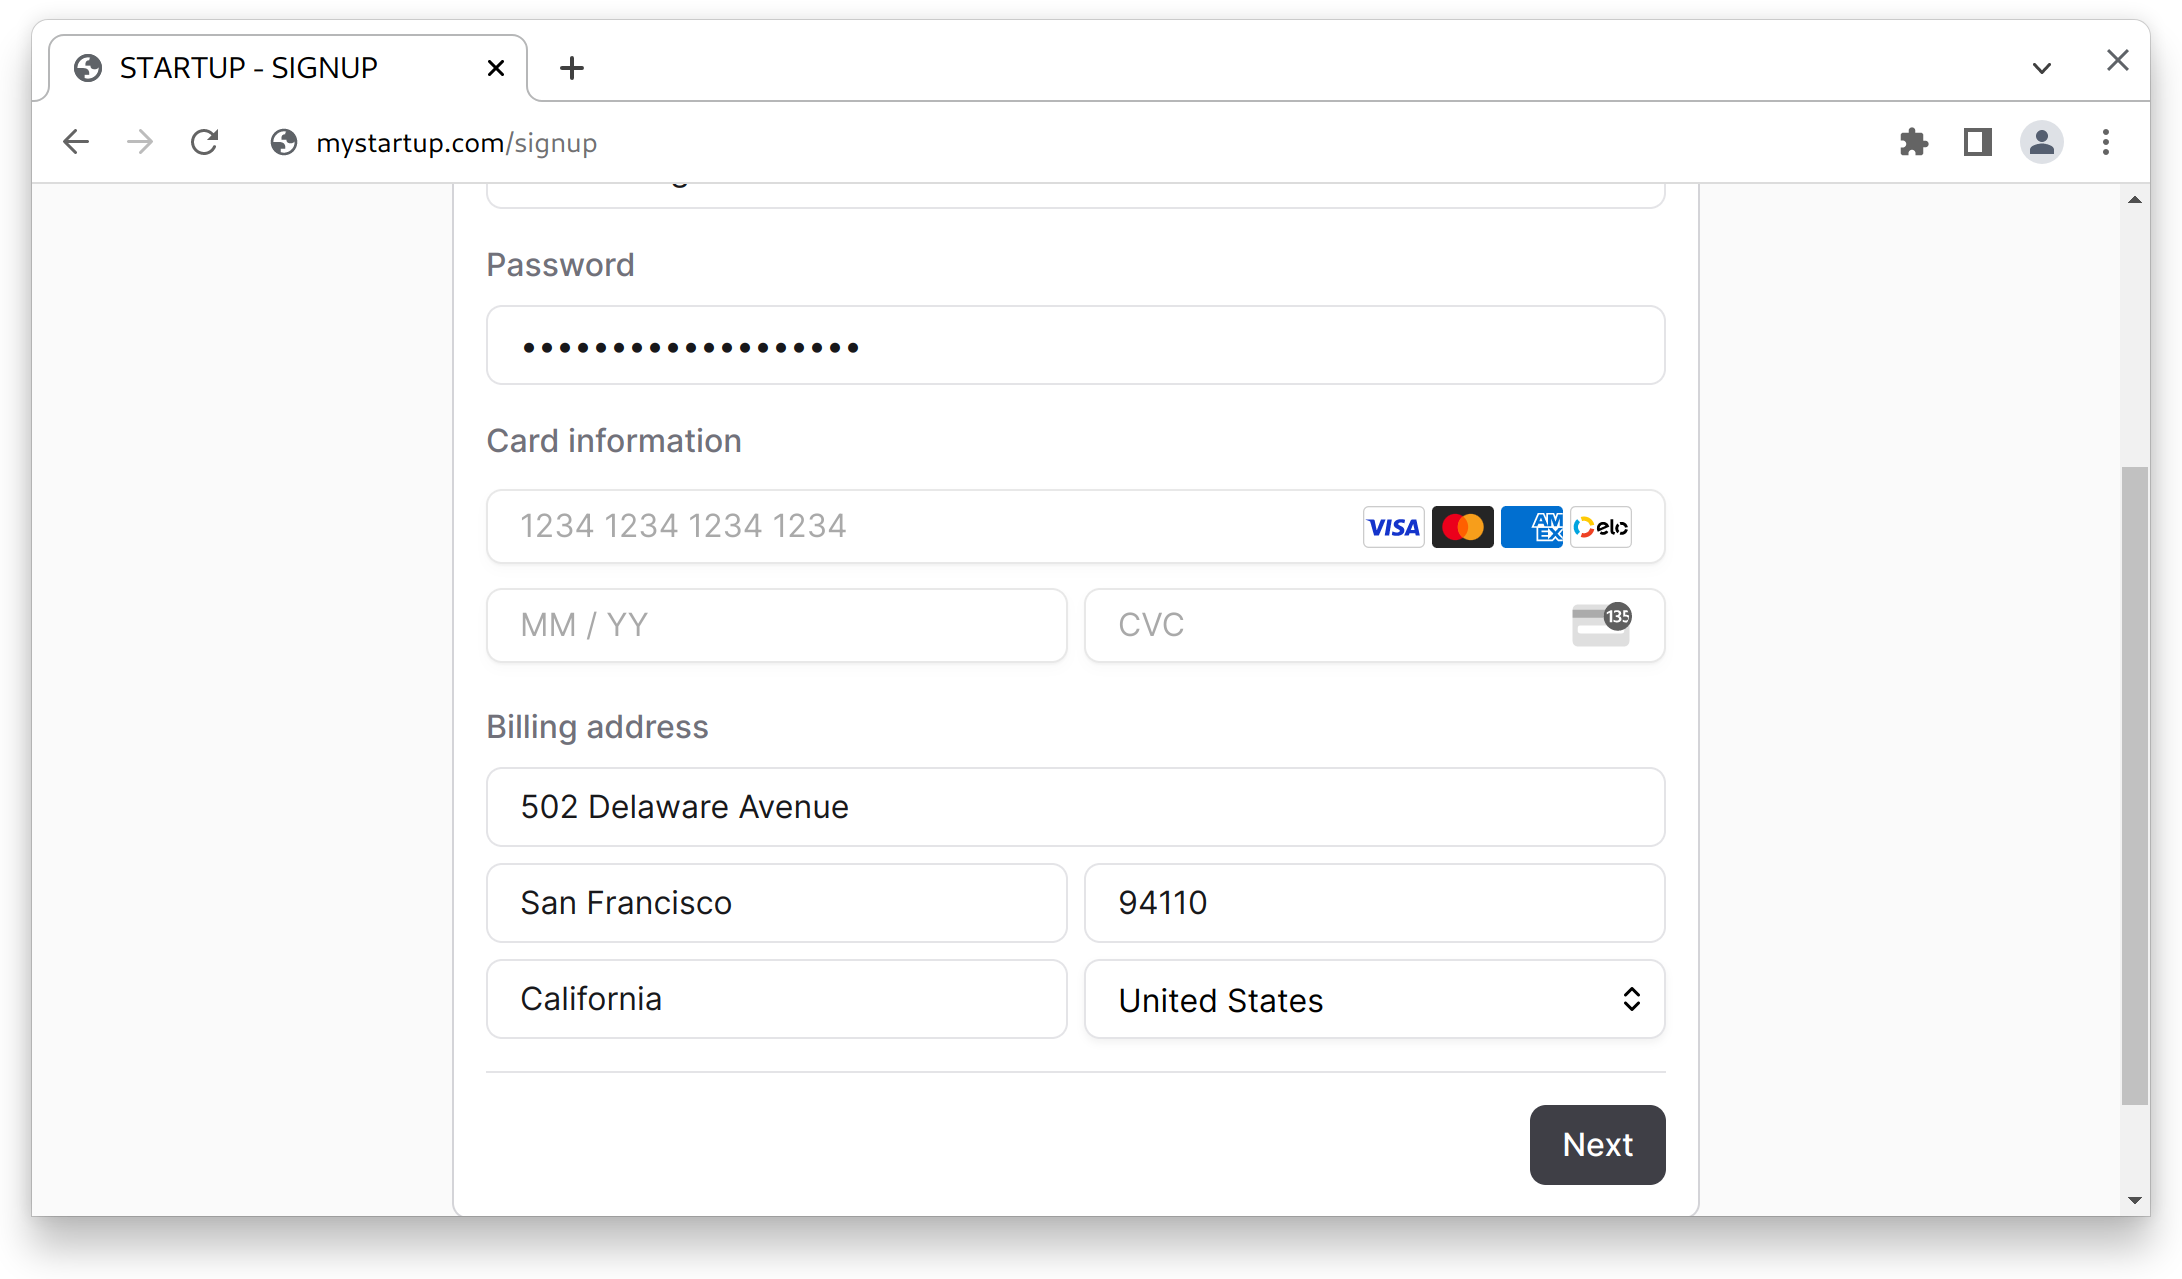
2. Collect Payment Information

Create a payment method session in Wingback (Backend)

Once you want to sign up a customer to plan, you’ll usually have to collect their payment information first. This is done by creating a payment method session for that customer on your backend and passing it on to your frontend, where it will be used to securely render a form and collect their payment data. You can also use Wingback to collect your customers billing address during this step. The Payment Session endpoint will return a token that you need to pass on to your Frontend.

Never request a payment session token from your frontend, as this would expose your Wingback API keys.
server.js
// Create a Payment Method Session Token

// TODO: fetch wingback customer id for user account from database
const wingbackCustomerId = "Cust_98672780-0099-4ec3-b13e-0716d1d38d02";

fetch('https://api.app.wingback.com/v1/c/customer/'+wingbackCustomerID+'/payment/session', {
  method: 'POST',
  headers: {
    'Content-Type': 'application/json',
    'wb-key': 'YOUR_SECRET_API_KEY'
  },
  body: JSON.stringify({
    operation: 'add_method'
    // optional
    provider: 'stripe',
    // also collect the billing address
    address: true
  })
})
  .then(response => response.json())
  .then(data => {
    console.log(data);
    const paymentSessionToken = data.token;
    // TODO: pass token to frontend
  })
  .catch(error => {
    console.error('Error creating payment session:', error);
  });

Add the Wingback.js script (Frontend)

Add the Wingback.js script to your page.

index.html
<script src="https://js.wingback.com/v1/wingback.js" defer></script>

Create a container for the Payment Element (Frontend)

Next, you’ll need to create an HTML element on your website where the Payment Element will be rendered. This should be part of your signup form.

index.html
<!-- TODO: add additional required signup data -->
<div id="paymentelement"></div>
<!-- ... --->
<!-- submit button (part of your signup form) -->
<button>Next</button>

Initialize Payment Session & render Payment Element (Frontend)

In your client side code, initialize the Payment Session and ask Wingback to render the Payment ELement.

client.js
// TODO: request payment session token from backend (step 2)
const token = "PSes_e4b1c065-f3c5-4be2-9755-82701ebdf1b5";
const paymentElement = await Wingback.createPaymentElement(token);
await paymentElement.render("#paymentelement");

This will inject a secure payment form into your signup page where your customer will enter their payment (and address) data.

Validate your Signup Form

To validate the form elements inside the Payment Element, call paymentElement.validate() inside your form validation function.

client.js
function validateForm() {
    // TODO: validate your own form elements
    return myForm.valid() && paymentElement.validate();
}

Submit the Payment Data

Once you have validated the form data, submit the payment (and address) data using paymentElement.confirm(). This will add the payment method to your payment processor and, in case of credit cards, perform a credit card authorization on your customers credit card. Once the payment method was successfully validated, it will automatically be stored with your payment processor and added to the linked Wingback Customer Profile.

client.js
paymentElement.confirm({
	success: (result) => {
	    //TODO: proceed to next step in signup flow
	},
	error: (error) => {
		console.log(error)
	}
});

3. Subscribe the Customer to a Plan (Backend)

Once the User has successfully signed up and added their payment data, you have to assign them to a plan in order to start charging them and granting them access to your product features. This is done through the Contract endpoint. Once you have created a subscription for a customer, you will then be able to retrieve their entitlements through the Entitlement API. That’s it!

server.js
fetch('https://api.app.wingback.com/v1/c/contract', {
  method: 'POST',
  headers: {
    'Content-Type': 'application/json',
    'wb-key': 'YOUR_SECRET_API_KEY'
  },
  body: JSON.stringify({
    "customer": wingbackCustomerId,
    // plan id can be retrieved from the Wingback Application
    "plan": "PP6964516404716267",
    //when to start charging
    "activation": new Date().toISOString(),

    "currency": "usd",
    "cycle": "month",
    // charge the default payment method automatically
    "automatic_payment": true,
  }).then(data => {
    console.log("customer successfully subscribed to plan");
    // TODO: pass token to frontend
  })
  .catch(error => {
    console.error('Error subscribing customer', error);
  });
})