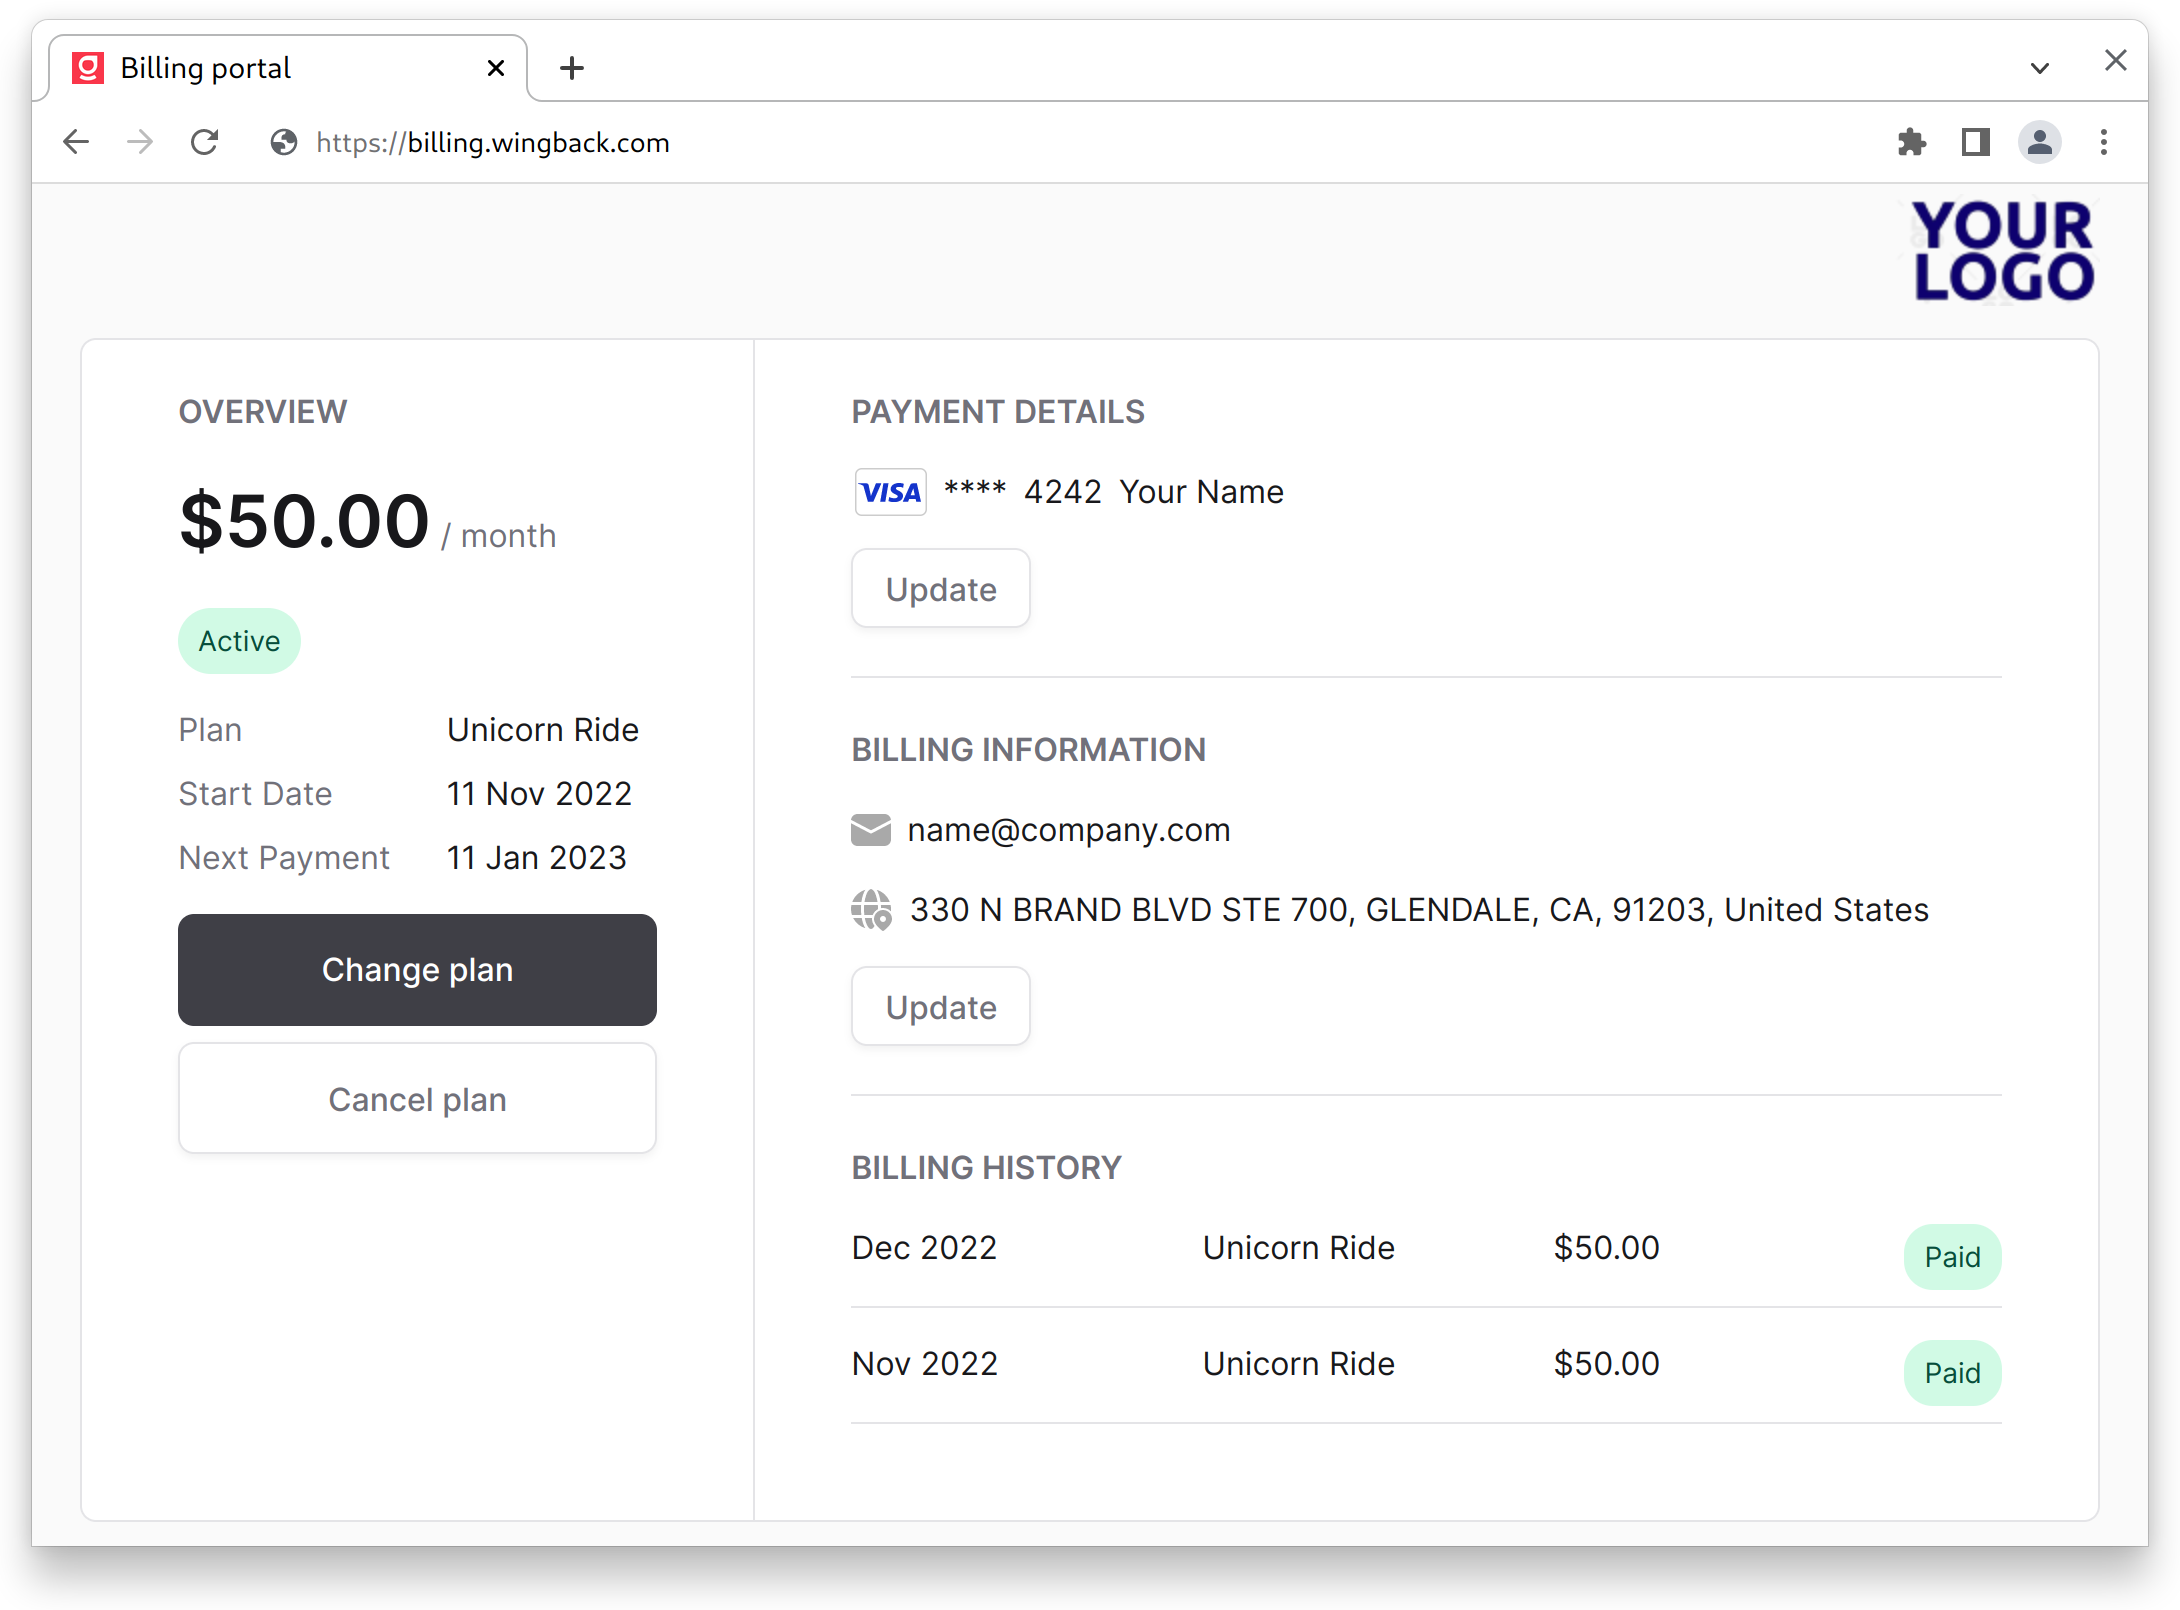
- View and change their current plan
- View their payment history and download receipts
- Securely update their payment details
- Manage their billing information
Integrating the Wingback Self-Serve Billing Portal
1. Create a Billing Portal Endpoint in your application
Add an endpoint to your application through which your customer will access their billing portal. Link to it to your settings page.settings.html
2. Validate that the customer is logged in and create a redirect URL (Backend)
Before redirecting the user to the billing portal, you’ll need to validate that the user is logged in to your application. This can be done by checking for a valid session or checking against your user database. Once you’ve confirmed that the user is logged in, you’ll need to create a redirect URL for the user to access the billing portal using the Authenticate endpoint. This can be done by setting theLocation header to the redirect URL and returning a 302 status code.
express-server.js